In my last post I started reviewing OpenShift - the new PaaS offering by Red-Hat.
After playing with the sample application provided with OpenShift, I wanted to check how to deploy my own application.
I decided to go with a very basic application created using SeamForge, a rapid application generation tool which is a part of the Seam framework. What's nice about SeamForge is that it also lets you to take an existing Java EE project and work-in new functionality.
Following the SeamForge documentation (7 simple steps and 9 commands) I generated a basic Java EE CRUD web-application.based on JSF, Facelets, Seam and Metawidget.
By the way, there is an open issue at the SeamForge Jira for directly deploying Forge application to OpenShift.
Next I went on to deploying an running the application on OpenShift:
The first step was to create a new application (applications --> add application).
Once the application is named and given a version, it is time to decide which infrastructure components are required for running the application. In order to do so, you need to choose the newly created application from the applications list and select the "Components" tab.
In this case I only needed a JDK and a JBoss application server (version 6 or 7). There was no need for an external database since the application uses the JBoss default datasource.
Next step is uploading the application files. Staying in my new application context, I switched to the "Files" tab and chose to upload the application war file. Notice that choosing to import an existing application requires a file in VPM format (and not a Java archive as I tried before RTFM).
After uploading, OpenShift automatically extracted my war file. From the "Files" tab I can now view my application files and edit them (in a very simple editor). This is very useful if you want to make some configuration changes without sending filed back and forth to the server.
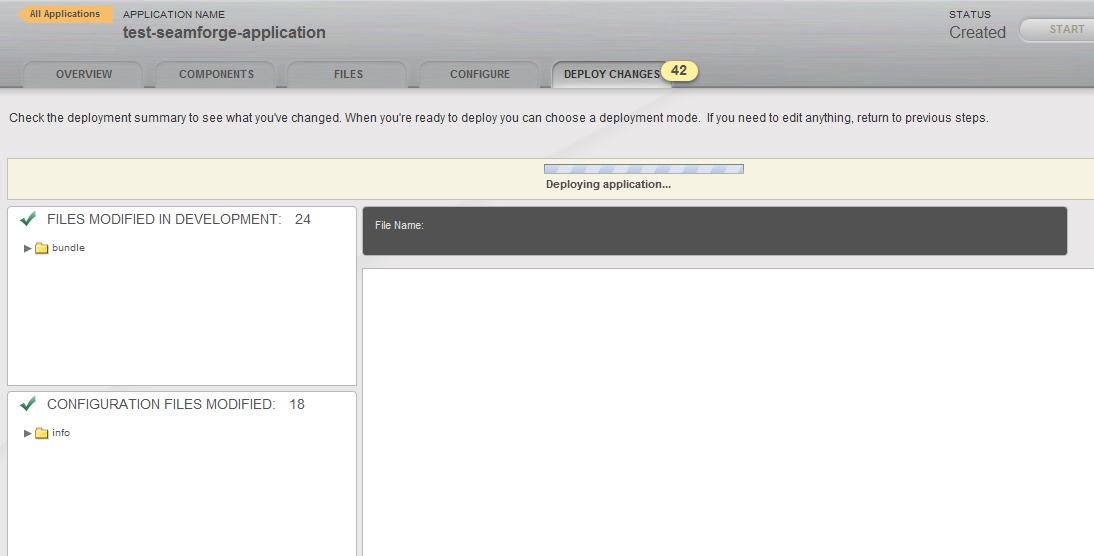
At this point OpenShift indicated that there are 42 changes to the application, which are actually all the files I imported. You can see the list of changes from the console and diff them with the previous versions of the files.
Since I had nothing more to configure I went on to deploying the application.In a more realistic scenario this would be the time to perform some configuration tasks on the various infrastructure components. OpenShift provides a way to configure the component using a wizard, which is actually a form with all the major configuration details, or expert mode which allows you to directly edit the configuration files.
So, last step was choosing to deploy all changes, which actually meant deploying the application to JBoss.
After the last step I had a deployed application which can be tested.
The "Overview" tab of the "Applications" section has all the information required for accessing your application.
Latest step was checking the application is actually working
So, using SeamForge and OpenShift I had a simple web application created, deployed an running in less than 10 minutes.
Of course this is a very simple application and not a real life scenario, and yet it shows a little about the power of RAD + PaaS.
Showing posts with label red-hat. Show all posts
Monday, May 23, 2011
Wednesday, May 18, 2011
Test Driving Red Hat OpenShift Flex
OpenShift is a new new platform-as-a-service offering by Red-Hat announced on May 4th.
OpenShift will be available in Express, Flex and Power modes. The Express and Flex offerings were made availability in developer preview and the Power option is coming soon.
The new platform is aimed for Java, Ruby, PHP, and Python applications, and has support for the MySQL and MongoDB databases.
OpenShift express offers free hosting while OpenShift Flex offers a greater degree of control and choice over the middleware components with built-in versioning, monitoring and auto scaling.
The OpenShift platform is based on code by Makara (a cloud start-up company acquired by Red-Hat in 2010) plus some RHEL isolation features, the JBoss EE runtime and some other components.
For now OpenShift is not open-sourced, but Red-Hat has promised to make the code available.
The OpenShift platform is based on code by Makara (a cloud start-up company acquired by Red-Hat in 2010) plus some RHEL isolation features, the JBoss EE runtime and some other components.
For now OpenShift is not open-sourced, but Red-Hat has promised to make the code available.
I decided to give the OpenShift Flex version a try.
In order to try OpenShift you have to register as a new user. After you a registered and logged in you can start using the Flex Console.
At the beginning you will have to follow a few initial setup steps including setting up a cloud provider (currently only Amazon EC2) , creating a cluster of servers and deploying a sample application. Notice that you need an active Amazon EC2 account and you will be required to provide your account access keys (can be found in the AWS management console).
The first 3 steps are part of an 8 steps self guided tour to OpenShift. You can come back to this guide whenever you want.
The Flex console is, surprisingly, a Flex based graphical user interface for provisioning cloud resources, governing the size and location of your cloud servers and managing the lifecycle of your cloud deployed applications.
The console is designed as a portal with a tab panel containing all major functionality of the console. The major areas of the console are:
The "INTRO" tab allows your to take the self guided tour and provides links to some how-to guides (PDF format).
The "CLOUDS" tab allows you to manage the cloud accounts which are used for hosting your applications.
Once you have a cloud account setup you can move on to the "CLUSTERS" tab for creating a cluster of servers and defining basic cluster characteristics such as number of servers, number of cores, memory and disk space and more advanced ones related to auto scaling. Additionaly this area contains functionality for importing/exporting database and setting email preferences.
Creating a new cluster will result with creating cloud servers and installing necessary software one them.
The "SERVERS" tab view information about the cloud servers in your cluster including basic resource utilization statistics. It also allows you to join/unjoin servers to a cluster.
Applications are added and managed in the "APPLICATIONS" tab. At this area you can control various aspects of the application lifecycle from build to deployment, view the application files, configure it and allocate various software components (JDK, web server, app server, database, cache and more). It is also possible to view various changes made to the application files, diff them with previous versions and deploy them to production.
The "PERFORMANCE" tab is used for performance monitoring and contains a lot of nicely displayed visual information about the performance of various components of the application from the underlying server to the application code.
Additionally there are tabs for viewing various logs and events.
My first experience with the console is OK, a little buggy and the UI still needs improvement, especially when some actions takes time and you do not get visual indication, while are actions leaves you stuck with a rotating clock indicator which never disappears. I also encountered some connectivity and stability issues, but after all this is only a developers preview version for now.
Next steps will be to test the more interesting features provided by OpenShift such as auto scaling and deploying my own applications on it (not the samples provided by Red-Hat).
At next posts I will dive deeper into the various functionality provided by OpenShift and my personal experience with it.
Subscribe to:
Posts (Atom)


